https://www.w3schools.com/jquery/default.asp
이 사이트서 jQuery Tutorial을 공부한 뒤 메소드명과 정의에 대해서만 정의하고자 함
- 각 메소드를 사용하는 예제소스는 https://www.w3schools.com/jquery/jquery_examples.asp 이곳에 가서 찾아볼 것
jQuery란?
- 자바스크립트 라이브러리
jQuery 사용방법
- 직접 다운로드 (https://jquery.com/download/) 또는 CDN 사용
- 나는 구글에서 제공하는 CDN을 사용하기 위해 아래 태그를 추가함
|
1
|
|
|
==========================================================
<< 정리 순서 >>
1. jQuery Selectors
2. jQuery Events
-click, dbclick, mouseenter, mouseleave, mousedown, mouseup, hover, keypress, keydown, keyup, submit,change, focus, blur, scroll, resize
3. jQuery Effects
-hide, show, toggle, fadeIn, fadeOut, fateToggle, fadeTo, slideDown, slideUp, slideToggle
4. jQuery HTML & CSS 관련 효과
-text, html, val, attr, append, prepent, attr, before, remove, empty, addClass, removeClass, toggleClass, css, width, height, innerWidth, innerHeight, outerWidth, outerHeight
5. jQeury Traversing
-parent, parents, parentsUtil, children, find, siblings, next, nextAll, nextUntil, prev, prevAll, prevUntil, first, last, eq, filter, not
1. jQuery Selectors
https://www.w3schools.com/jquery/jquery_ref_selectors.asp
selectors reference 모음집이다. 여기를 들어가서 확인해보는게 빠름!
jQuery Selectors
jQuery Selectors jQuery Selectors Use our jQuery Selector Tester to demonstrate the different selectors. Selector Example Selects * $("*") All elements #id $("#lastname") The element with id="lastname" .class $(".intro") All elements with class="intro" .cl
www.w3schools.com
2. jQuery Events
브라우저가 사용자의 행동에 따라 반응할 수 있도록 하는 것
| Mouse Events | Keyboard Events | Form Events | Document/Window Events |
| click() : 마우스 클릭시 | keypress(): 키보드 키 누르면 | submit(): 폼태그 input 정보를 submit 할 때 | scroll(): 화면을 스크롤 할 때 |
| dbclick(): 마우스 더블클릭 | keydown(): 키보드 키 눌러져있는 상태일 때 | change(): input정보를 변경후 마우스 커서를 input 밖으로 클릭시 | resize(): 화면의 크키를 변경할 때 |
|
mouseenter(): 마우스 가져다댈 때 |
keyup(): 키보드 키 눌러져있다가 때어졌을 때 | focus(): input태그안에 마우스 클릭시 (예시있음) | |
| mouseleave(): 마우스 가져다댄 뒤 땠을 때 | blur(): input태그안에 마우스 클릭후 땠을때 (예시있음) | ||
| mousedown(): 마우스 가져다댄 뒤 마우스 클릭시 | |||
| mouseup(): 마우스 가져다댄 뒤 마우스 클릭하고 땔 때 | |||
|
hover(): mouseenter & mouseleave의 효과를 함께 낼 수 있음 (예시있음) |
hover() 예시
|
1
2
3
4
5
6
7
8
9
10
11
12
13
14
15
16
17
18
19
|
<!DOCTYPE html>
<html>
<head>
<script>
$(document).ready(function(){
$("#p1").hover(function(){
alert("You entered p1!");
},
function(){
alert("Bye! You now leave p1!");
});
});
</script>
</head>
<body>
<p id="p1">This is a paragraph.</p>
</body>
</html>
|
|
focus() & blur() 예시
|
1
2
3
4
5
6
7
8
9
10
11
12
13
14
15
16
17
18
19
20
21
22
|
<!DOCTYPE html>
<html>
<head>
<script>
$(document).ready(function(){
$("input").focus(function(){
$(this).css("background-color", "yellow");
});
$("input").blur(function(){
$(this).css("background-color", "green");
});
});
</script>
</head>
<body>
Name: <input type="text" name="fullname"><br>
Email: <input type="text" name="email">
</body>
</html>
|
|
on () :
-선택한 요소에 대해 한 개 이상의 이벤트 헨들러 등록 원할 때 사용
$("p").on("click", function(){
  $(this).hide();
});|
1
2
3
4
5
6
7
8
9
10
11
12
13
14
15
16
17
18
19
20
21
22
23
24
|
<!DOCTYPE html>
<html>
<head>
<script>
$(document).ready(function(){
$("p").on({
mouseenter: function(){
$(this).css("background-color", "lightgray");
},
mouseleave: function(){
$(this).css("background-color", "lightblue");
},
click: function(){
$(this).css("background-color", "yellow");
}
});
});
</script>
</head>
<body>
<p>Click or move the mouse pointer over this paragraph.</p>
</body>
</html>
|
|
3. jQuery Effects
| Hide/Show |
* $(selector).hide() : 숨겨버림 (태그도 없애므로 공간도 사라짐) * $(selector).show() : 숨겨진 요소를 다시 보이도록 * $(selector).toggle() : 클릭시 보여주기 & 또다시 클릭시 숨기기 왔다갔다 (예시있음) |
||||||
| Fade |
* $(selector).fadeIn() : 선택한 요소 나타나도록 * $(selector).fadeOut() : 선택한 요소 사라지도록 * $(selector).fadeToggle() : 선택한 요소 사라지기(fadeOut) & 나타나기(fadeIn) 반복 * $(selector).fadeTo(speed, opacity) : 투명도를 유지한채로 fadeOut 됨 (예시있음) |
||||||
| Slide |
* $(selector).slideDown() : 선택한 요소 슬라이드 하며 내려오도록 * $(selector).slideUp() : 선택한 요소 슬라이드 하며 올라가도록 * $(selector).slideToggle() : 선택한 요소 slideDown과 slideUp 반복 |
||||||
| Animate |
* $(selector).animate({params}, speed) : css속성을 움직이게 하는 등 여러 애니메이션 효과를 줌 < animate()으로 가능한 기능들 > (각자 예시 있음) - 하나의 css 속성만 animate 시킴 - 하나이상의 css 속성 동시에 animate 시킴 - 하나이상의 css 속성 순서에 맞춰(하나 다음에 하나실행) animate 시킴 |
||||||
| Stop |
* $(selector).stop() : effes 또는 animation이 끝나기전, 그 해당 효과를 멈추게 함 (ex. 슬라이딩 되는 효과 도중에 슬라이딩 효과를 멈추게 하는 것) |
||||||
| Callback |
Callback: 현재 effect가 끝난 다음에서야 다음 function이 실행됨 (아래예시: hide효과먼저, 그 다음 alert)
Non-callback : 원치않는 순서로 나올 수 있다는 단점 (아래예시: alert 먼저, 그 다음 hide효과)
|
||||||
| Chaining |
한 번에 여러 메소드들 체인처럼 연결해서 사용 가능 ex) $("#p1").css("color", "red").slideUp(2000).slideDown(2000); |
||||||
toggle() 예시
|
1
2
3
4
5
6
7
8
9
10
11
12
13
14
15
16
17
18
19
|
<!DOCTYPE html>
<html>
<head>
<script>
$(document).ready(function(){
$("button").click(function(){
$("p").toggle();
});
});
</script>
</head>
<body>
<button>Toggle between hiding and showing the paragraphs</button>
<p>This is a paragraph with little content.</p>
<p>This is another small paragraph.</p>
</body>
</html>
|
|
toggleTo() 예시
|
1
2
3
4
5
6
7
8
9
10
11
12
13
14
15
16
17
18
19
20
21
22
23
24
25
26
27
|
<!DOCTYPE html>
<html>
<head>
<script>
$(document).ready(function(){
$("button").click(function(){
$("#div1").fadeTo("slow", 0.15);
$("#div2").fadeTo("slow", 0.4);
$("#div3").fadeTo("slow", 0.7);
});
});
</script>
</head>
<body>
<p>Demonstrate fadeTo() with different parameters.</p>
<button>Click to fade boxes</button><br><br>
<div id="div1" style="width:80px;height:80px;background-color:red;"></div><br>
<div id="div2" style="width:80px;height:80px;background-color:green;"></div><br>
<div id="div3" style="width:80px;height:80px;background-color:blue;"></div>
</body>
</html>
|
|
animate() 예시 : 하나의 css 속성만 animate 시킴
|
1
2
3
4
5
6
7
8
9
10
11
12
13
14
15
16
17
18
19
20
21
22
23
24
25
26
27
|
<!DOCTYPE html>
<html>
<head>
<script>
$(document).ready(function(){
$("button").click(function(){
$("button").click(function(){
$("div").animate({left: '250px'}); }); });
</script>
</head>
<body>
<p>Demonstrate fadeTo() with different parameters.</p>
<button>Click to fade boxes</button><br><br>
<p>By default, all HTML elements have a static position, and cannot be moved. To manipulate the position, remember to first set the CSS position property of the element to relative, fixed, or absolute!</p> <div style="background:#98bf21;height:100px;width:100px;position:absolute;"></div> </body>
</html>
|
|
animate() 예시 : 하나이상의 css 속성 동시에 animate 시킴
|
1
2
3
4
5
6
7
8
9
10
11
12
13
14
15
16
17
18
19
20
21
22
23
24
25
26
27
28
|
<!DOCTYPE html>
<html>
<head>
<script>
$(document).ready(function(){
$("button").click(function(){
$("div").animate({
left: '250px',
opacity: '0.5',
height: '150px',
width: '150px'
});
});
});
</script>
</head>
<body>
<button>Start Animation</button>
<p>By default, all HTML elements have a static position, and cannot be moved. To manipulate the position,
remember to first set the CSS position property of the element to relative, fixed, or absolute!</p>
<div style="background:#98bf21;height:100px;width:100px;position:absolute;"></div>
</body>
</html>
|
|
animate() 예시 : 하나이상의 css 속성 순서에 맞춰(하나 다음에 하나실행) animate 시킴
|
1
2
3
4
5
6
7
8
9
10
11
12
13
14
15
16
17
18
19
20
21
22
23
24
25
26
27
|
<!DOCTYPE html>
<html>
<head>
<script>
$(document).ready(function(){
$("button").click(function(){
var div = $("div");
div.animate({height: '300px', opacity: '0.4'}, "slow");
div.animate({width: '300px', opacity: '0.8'}, "slow");
div.animate({height: '100px', opacity: '0.4'}, "slow");
div.animate({width: '100px', opacity: '0.8'}, "slow");
});
});
</script>
</head>
<body>
<button>Start Animation</button>
<p>By default, all HTML elements have a static position, and cannot be moved.
To manipulate the position, remember to first set the CSS position property
of the element to relative, fixed, or absolute!</p>
<div style="background:#98bf21;height:100px;width:100px;position:absolute;"></div>
</body>
</html>
|
|
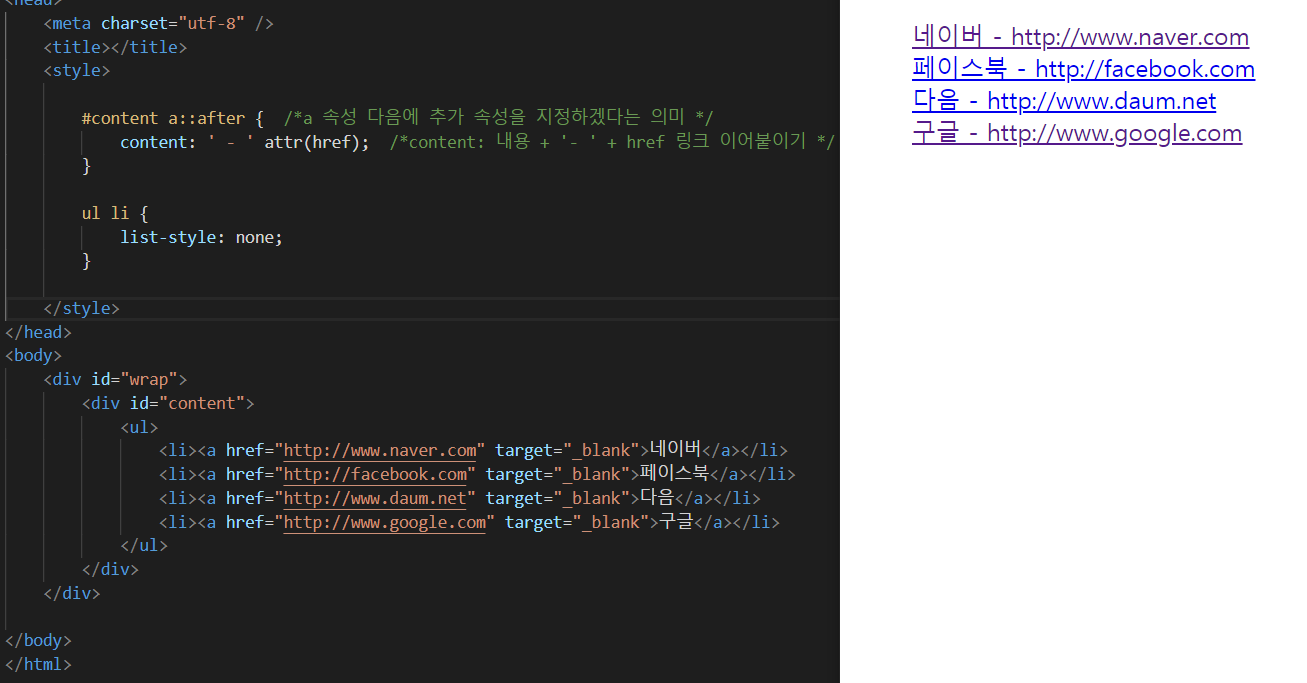
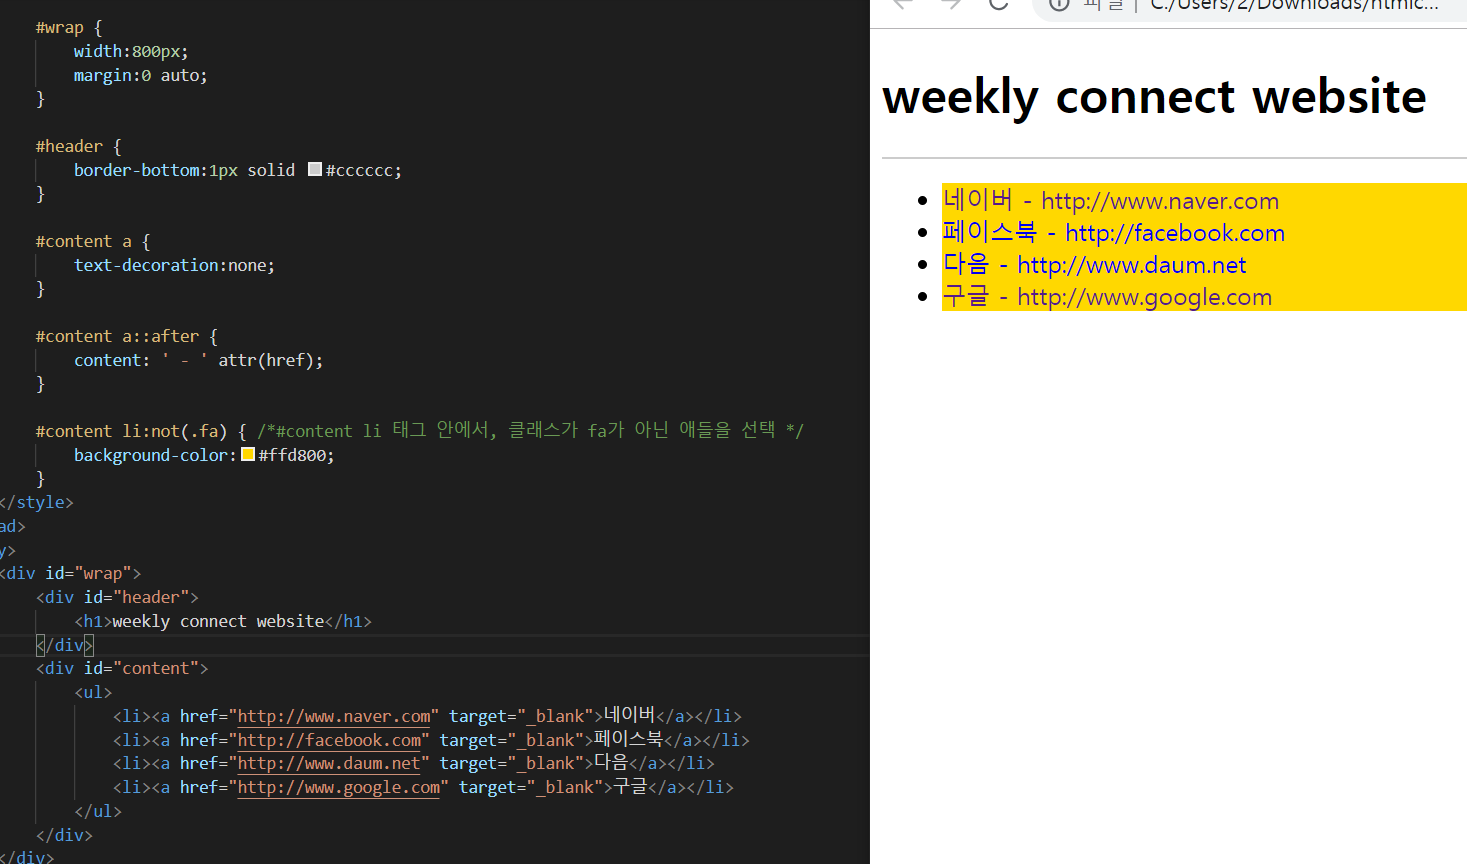
4. jQuery HTML (DOM manipulation)& CSS 관련 효과
|
HTML |
Get/Set |
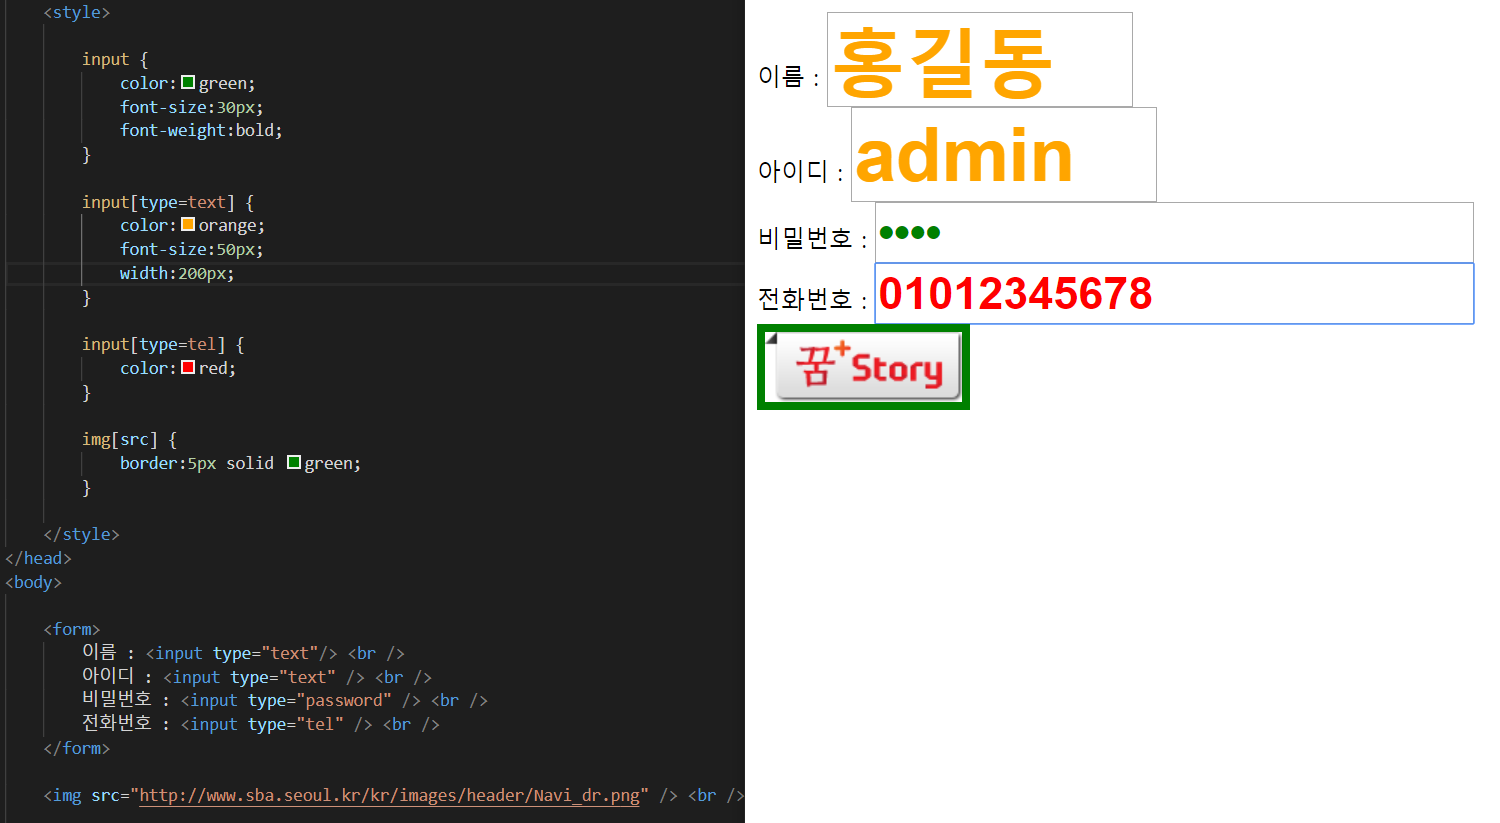
text() : html안의 텍스트글자만 그대로 get html() : html안의 텍스트글자 그대로 get (with HTML markup) val() : form의 input 필드의 값 get attr("속성") : 속성의 값 get |
| Add |
$(selector).append("해당 요소") : selector를 해당 요소 맨 마지막에 붙임 $(selector).prepend("해당 요소") : selector를 해당 요소 맨 앞에 붙임 $(selector).after("해당 요소") : selector를 해당 요소 바로 다음에 붙임 $(selector).before("해당 요소") : selector를 해당 요소 바로 이전에 붙임 |
|
| Remove |
remove() : 공간과 함께 선택한 요소 없애기 empty() : 공간은 남기고 내용(text)만 없애기 (즉, 자식요소만 없앰) |
|
| CSS | CSS Classes |
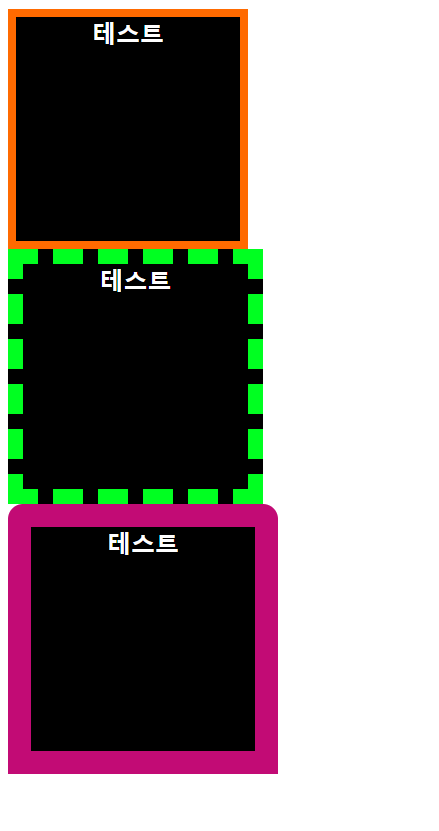
addClass("클래스명") : 클래스명 넣음으로써 클래스 추가 removeClass("클래스명") : 빼려는 클래스명 쓰기 toggleClass("클래스명") : addClass & removeClass 번갈아가면서 |
| CSS() |
<여러 역할> 1) css("속성명") : CSS 속성 반환 받음(get) 2) css("속성명", "속성값") : 하나의 CSS 속성 변경(set) |
|
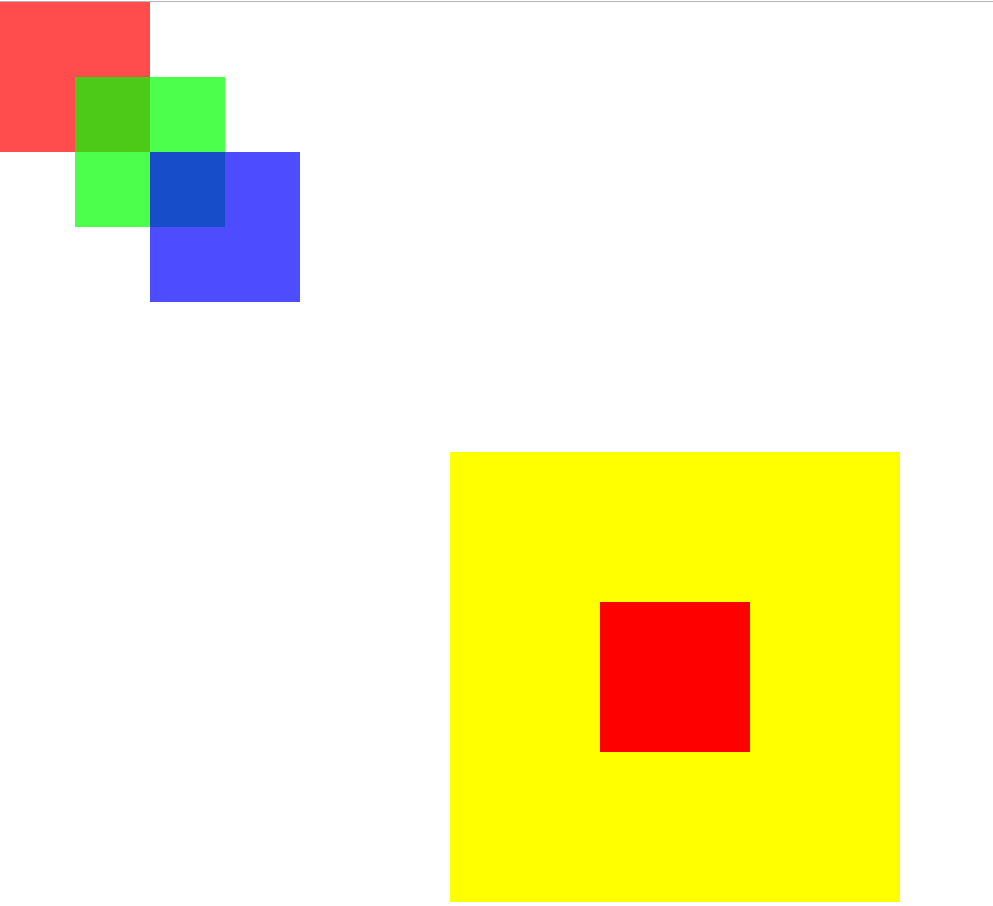
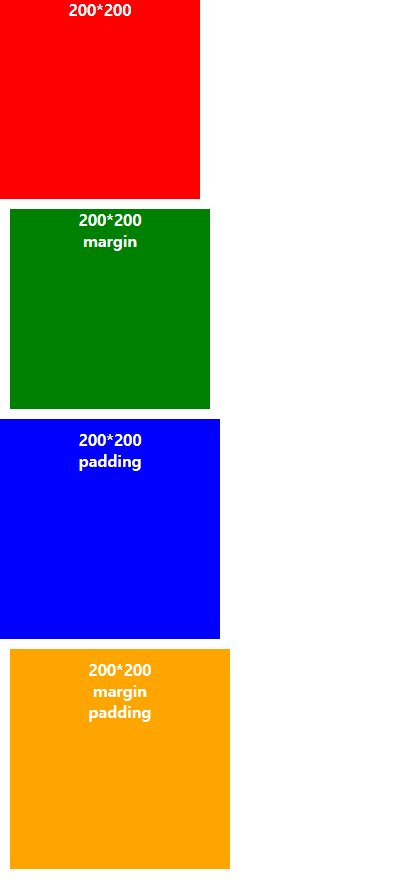
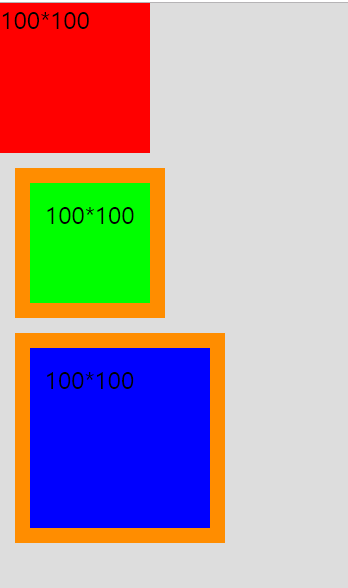
| Dimensions | 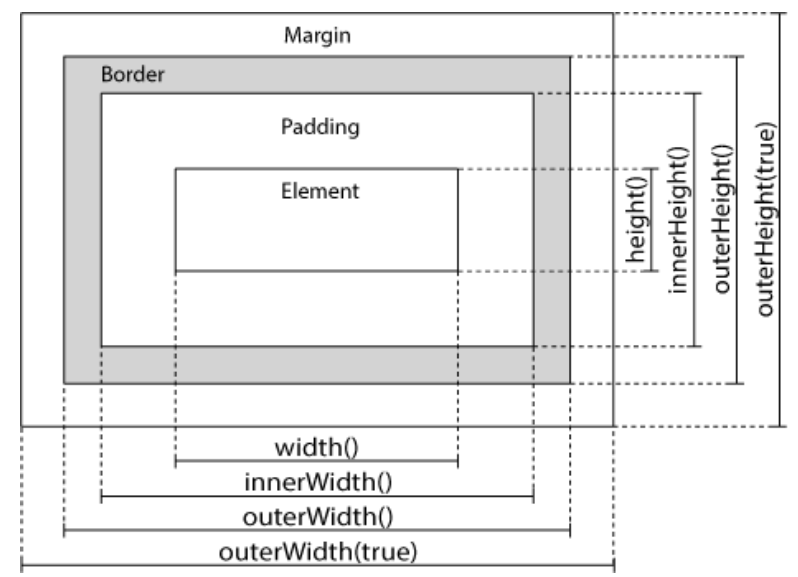 width() / height() : element만 포함된 width/height 가져옴(get) innerWidth() / innerHeight() : padding 포함 (ex. innerWidth = width + padding) outerWidth() / outerHeight() : padding & border 포함된 width/height 가져옴 outerWidth(true) / outerHeight(true) : padding & border & margin 포함된 width/height 가져옴(get) |
5. jQuery Traversing
| Ancestors |
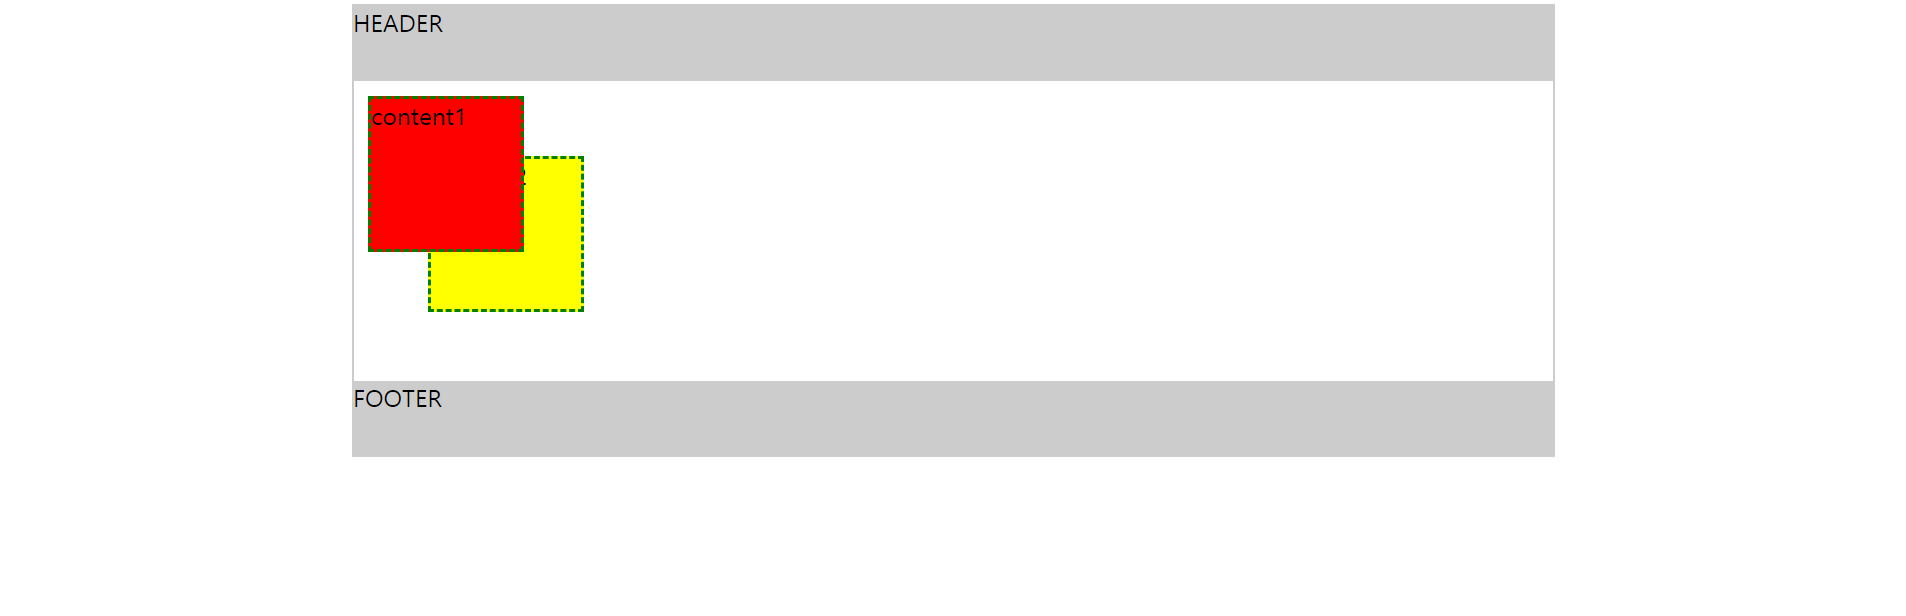
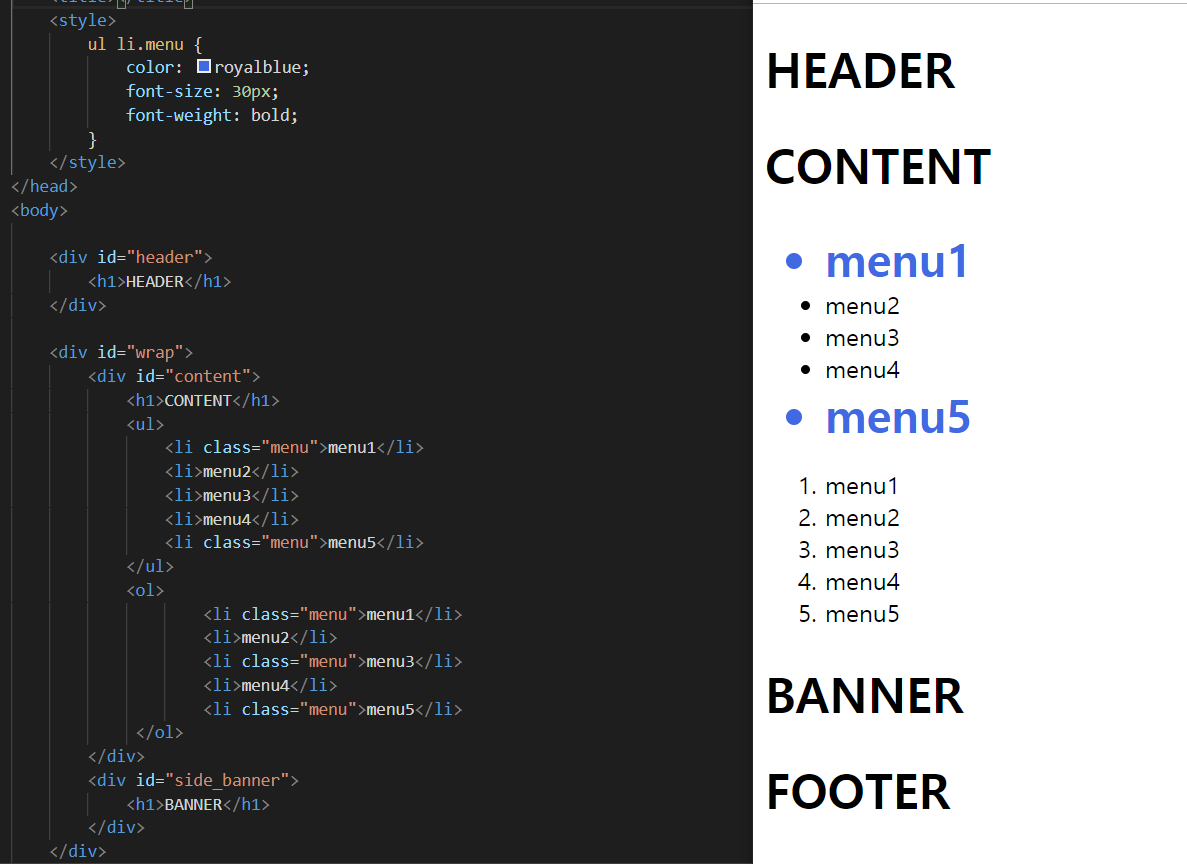
parent() :direct 부모 선택 parents() : 자신 위 모두 선택 parentsUtil(): 선택요소부터 다음 선택요소까지 다 선택(아래 ex: span태그부터 div태그 직전까지 모두 선택)
|
|||
| Descendants |
children() : direct 자식 선택 find("선택") : 자신의 자식들 중 선택요소에 해당하는 것 모두 선택 (ex. $("div").find("span"); <-- returns all <span> elements that are descendants of <div> ) |
|||
|
Siblings (동일한 부모를 공유) |
siblings() :동일한 부모를 가진 모든 siblings 선택 next() : next sibling 선택 nextAll() : all next siblings 선택 nextUntil() : all next sibling between two given elements 선택 prev() : next()의 반대 prevAll() : nextAll()의 반대 prevUntil() : nnextUntilext()의 반대 |
|||
| Filtering |
first() : 1st element of the specified elements ( last() : last element of the specified elements eq(인덱스) : element with a specific index number of the selected elements filter() : () <- 요 안에 넣은 요소에 해당하는 태그들 선택 not() : filter의 반대 |
|||
6. jQuery AJAX
*형식: $.ajax({name : value, name : value, name : value, ...});
*name 종류: (밑줄 친게 자주 쓰이는 속성)
-async, beforeSend, cache, complete, contentType, context, data, dataFilter, dataType, error, global, password, processData, scriptCharset, success, timeout, traditional, type, url, username, xhr